June 12, 2023
Call of Duty: Modern Warfare II Season 04 — Showdown Map Intel
The Mission: Detailing the map, tactics, and tips for a 6v6 Multiplayer map set around an iconic courtyard in southeastern Al Mazrah.
Selected region: United States

June 12, 2023
The Mission: Detailing the map, tactics, and tips for a 6v6 Multiplayer map set in the arts district of Vondel.
The Mission: Detailing the map, tactics, and tips for a 6v6 Multiplayer map set in the arts district of Vondel.
June 12, 2023
Welcome to the arts district of Vondel — the new Season 04 Call of Duty®: Warzone™ map — a Core 6v6 Multiplayer map positioned west of the Museum and across the water from the Stadium and Police Station.
This small- to midsized Multiplayer map features a variety of boutique shops and town houses along its classic three-lane layout, with a canal for underwater operations and street art adorning its buildings and central plaza. With a map punctuated by small interior locations, Operators have plentiful options for weaving in and out of its main roads, with opportunities for close-, mid-, and long-ranged combat alike.

KorTac Spawn Zone (South) — Back Alley
Starting in the Back Alley, KorTac forces have access to three forward routes: west through the Streetwear clothing store toward the Canal and Checkpoint, straight ahead to the Plaza, or to the east toward the Park Entrance and up through Vans.
Generally, taking the middle path presents the most danger, as the Plaza is at a disadvantage against enemies positioned at the top of Stairs. Therefore, you may have more luck moving up Vans in the east, or, when moving up the western path, taking a swim in the Canal until you get past sight of the Plaza and Stairs.

SpecGru Spawn Zone (North) — Road
Entering from the northern Road, SpecGru forces are also presented with three routes forward, though the map’s asymmetrical design presents some different risks and opportunities.
Head straight through Connector to the top of Stairs for a strong vantage point against KorTac forces moving up through Plaza and the western Riverside. When taking the eastern path through Construction, be aware of the sudden drop in the road past the flatbed truck — this could potentially obscure your sight of enemies heading toward your position. Consider setting up by the south window of House, cutting them down as they reach your level. In the west, watch for snipers utilizing the long, straight path to engage from far out, and look for swimmers in the Canal trying to avoid attention from the central Stairs.

For the purposes of this guide, we’re dividing Kunstenaar District into four main sections:
- Canal
- Residential
- Shops
- Park Side
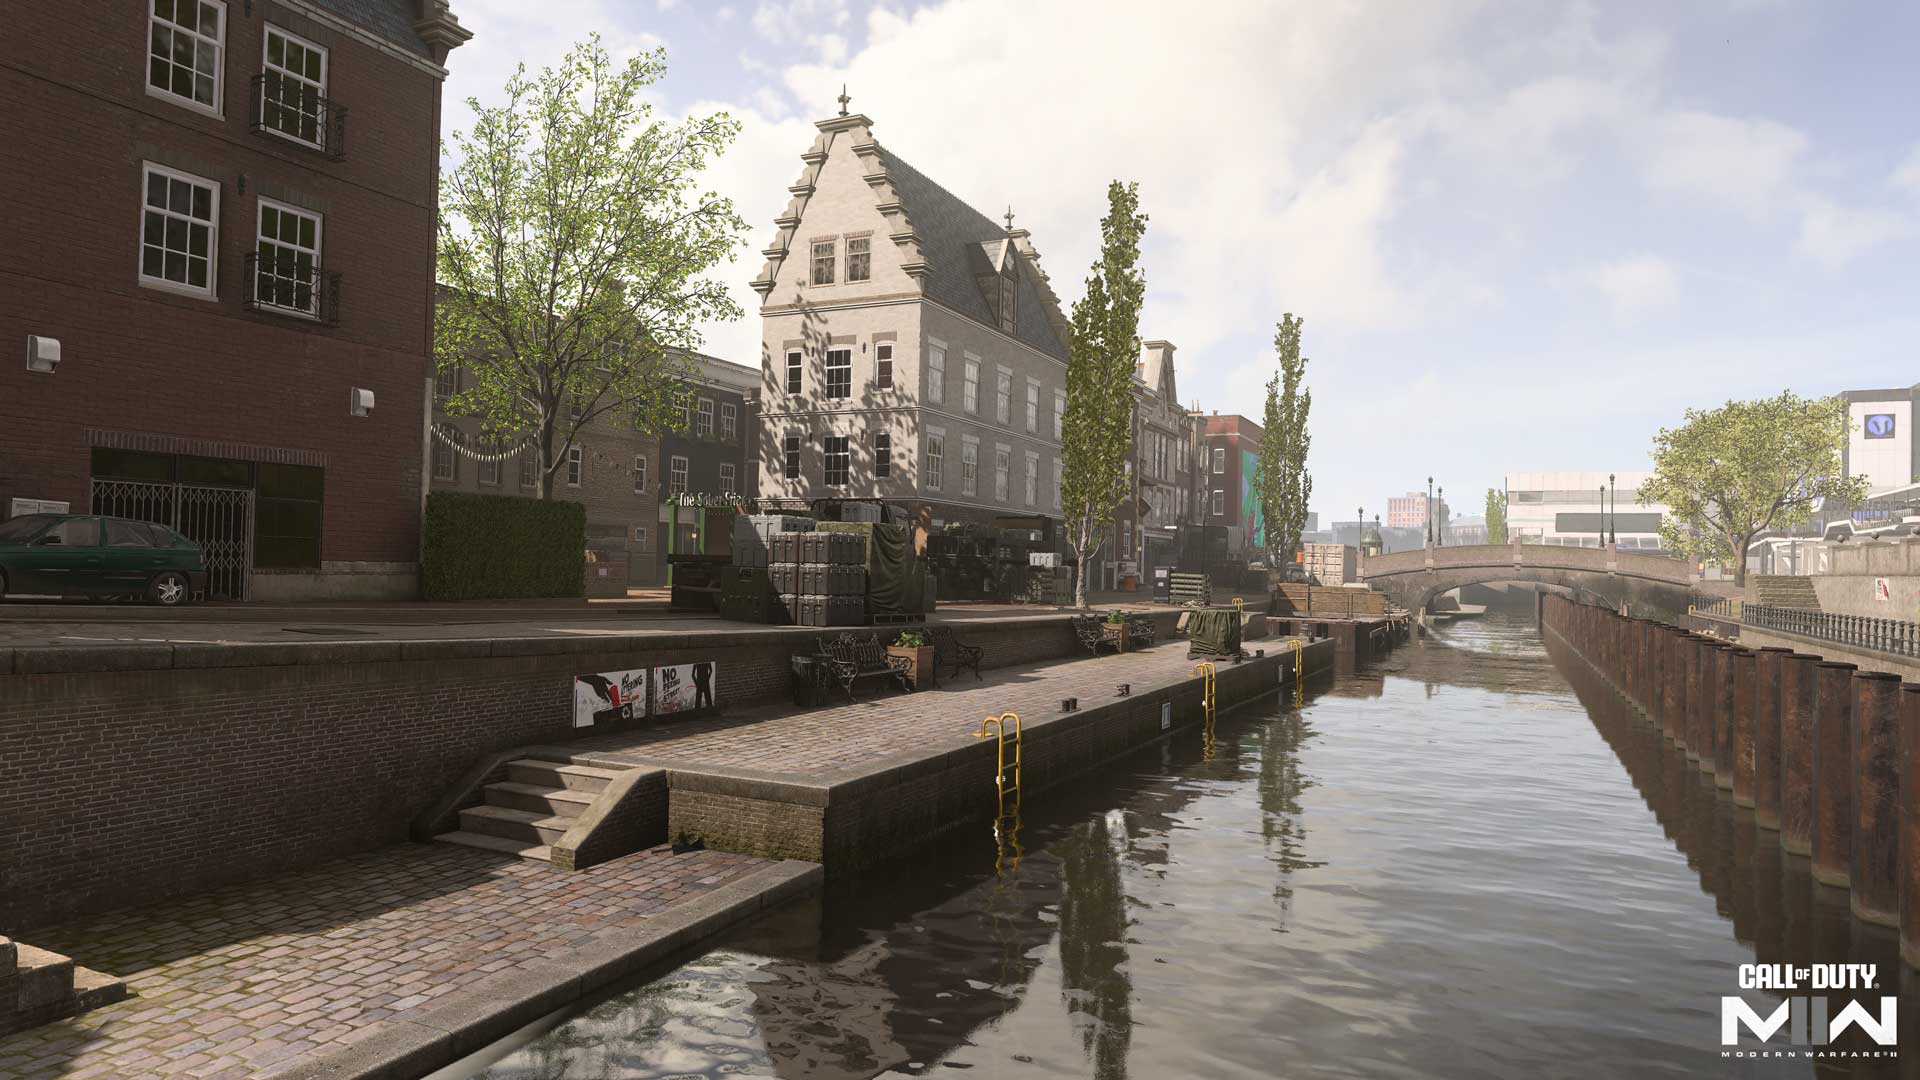
Canal
With the Canal and the western pathway running alongside it, this area is a hot spot of long-ranged activity as opposing sides take shots from either end of the map. For those looking to close the distance, several large vehicles offer substantial cover and a means to get up and over street level for a more commanding view. You don’t have to worry about them blowing up under fire, either; these trucks are sturdy.
To avoid getting hit from the side, be aware of the Stairs and Plaza when moving up through the middle. As mentioned earlier, swimming through the Canal will keep you out of sight, but it’ll also slow you down.
Residential
Comprising the northern half of the map, including the main Road behind it, the Residential area sits at a higher elevation compared to its southern counterpart. Midranged engagements rule the outside, favoring Assault Rifles along Road and SMGs as you approach the back of the House. Note the flatbed truck parked along the wall here; the barrels strapped to it provide good cover against enemies moving up from the Plaza.
Combat becomes much tighter in the interior spaces here: House, Bike Shop, and Connector. When aerial streaks come calling, expect these areas to become hot zones.
Finally, the power position afforded by the Stairs is certain to draw attention. Use them, then move on before becoming a high-value target. When attacking the position, consider coming in from the eastern Archway, a difficult position to cover from up top.
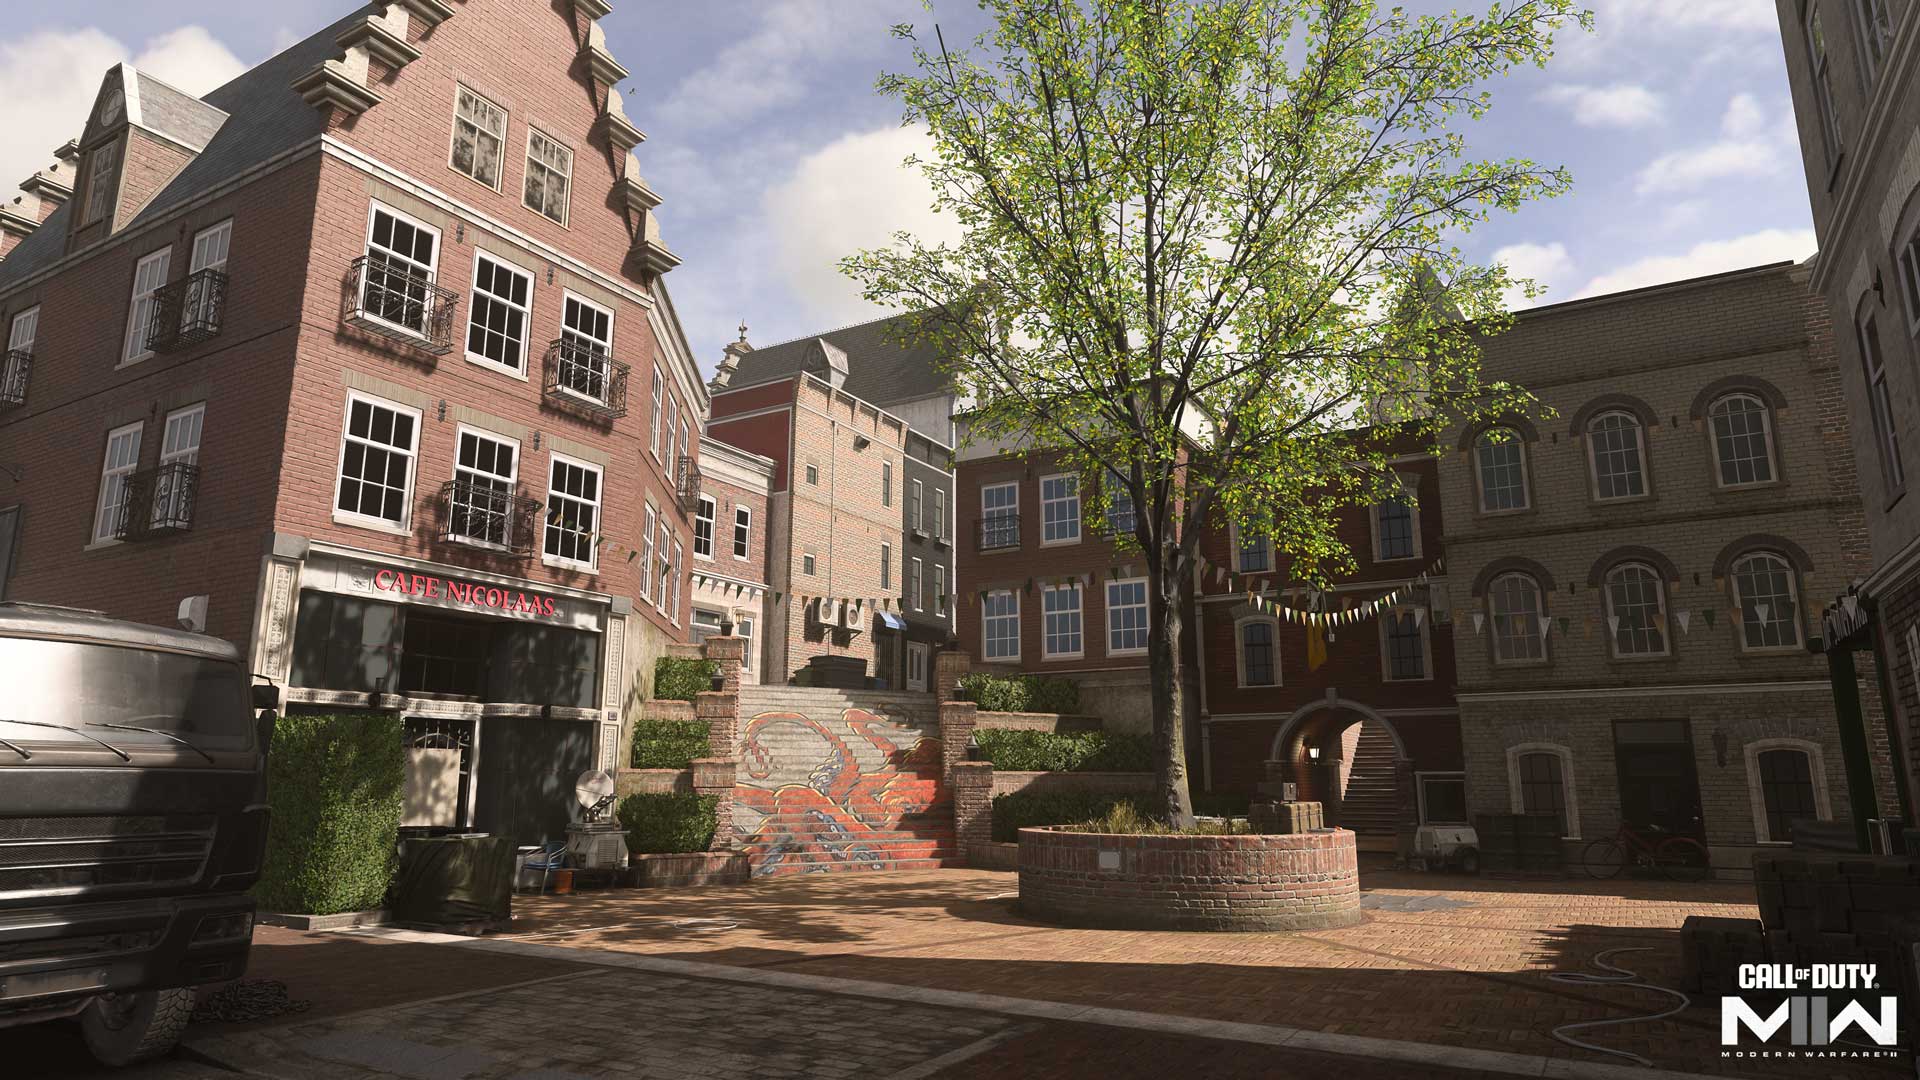
Shops
The southern shops area funnels Operators into narrow engagements through its exterior alleyways and the Streetwear and Laundry interior spaces. With fewer cover pieces around, fights here are more often determined by who has the quicker draw, so be aggressive.
Don’t neglect the usefulness of the Sober Friar Restaurant when attacking the central Plaza. Though it may feel exposed, it offers valuable partial cover against enemy Operators on the other side. When defending the area, Laundry and Streetwear become worthy paths as well; use them to quickly change your position between the middle and outer lanes.
Park Side
Though longshots are also a concern — and an opportunity — here, the road’s angled path makes it less of a concern compared to the long, flat road along Canal. Still, there’s plenty of danger to be found here, with several pathways leading abruptly into the area from the middle path, as well as consistently placed vehicles and other large cover objects to obscure the view of incoming enemies.
Use the Museum boundary here, which allows you to get above street level. While you’re more exposed this way, it also gives you a clearer sight down the road. At the path’s far north end, the stone staircase offers a great view over Road. When defending against enemies coming in through the middle, consider setting up in one of the flat grass areas, reducing your chances of getting spotted by enemies along the road.
Mode Intel: Domination
Kunstenaar District’s tight, three-lane layout presents danger at every turn in Domination matches. If your squad groups up too tightly, the risk of getting flanked runs high, so spread out when covering objectives to increase your awareness of incoming danger. If you encounter fierce resistance down one lane, shift to another, always prodding for an opening in the enemy’s defense.
With the A and C flags positioned near the east road, the action tends to be more intense on that end of the map in this mode, thought that heightened attention can be used to make a play at B from the west. Don’t be too rigid about which flags to focus on, however; any two will do, and on a small map like this, the objectives are likely to change hands often.
Mode Intel: Search & Destroy
Slow it down in Search & Destroy and remain especially wary of enemy snipers utilizing the map’s long sight lines to get an early elimination in the match. Subterfuge can be deadly here — open fire, throw grenades, or otherwise get the enemy team’s attention while setting up a flank to eliminate them as they respond to the targeted location.
The bomb site positions focus the fight on the outer roads, and their proximity to the central Plaza makes it tempting to cross the open area. Be wary of this highly exposed move and eliminate hasty enemies who do. If you notice any open doors or broken windows when passing an interior location, toss a grenade inside just in case, and take advantage of the many large vehicles by mantling on top of them for a greater view.
Mode Intel: Hardpoint
The opening Hardpoint spells chaos right from the start, sending both teams careening toward the volatile central Plaza. Try approaching the objective from multiple angles to split the enemy’s attention. Once the Hardpoint is yours, remember that you only need one Operator inside to accumulate points; the rest of the team can then spread out to better cover the multiple pathways leading toward the objective.
Get moving to the next objective location before the current Hardpoint runs out, especially between the second and third Hardpoints and the fourth and fifth, each requiring a greater distance of travel between them. Carry a Launcher — or be willing to switch to a Loadout that has one — to respond to enemy aerial streaks, particularly UAVs. Executing pincer attacks or attempting a stealth movement through the Canal won’t be of much help if they can see you coming.
1. Fight horizontally. Kunstenaar District’s layout tends to funnel the battle along its three primary vertical lanes of engagement, though you can catch the enemy off guard by focusing on a more horizontal playstyle, moving between the three lanes to keep the enemy at bay.
2. Browse a little. You might think that the crammed interior spaces are mostly useful for passing through, but don’t be in such a rush to get to the other side. Use the available windows and doors to seek out and eliminate any nearby Operators; then move on once the coast is clear.
3. Go fishing. Suspect there’s an enemy Operator swimming in the water but don’t have time to wait for them to come up for air? Fire some shots along the water’s path to see if you get a hitmarker. The Canal is narrow enough that you’ve got a decent chance of connecting if someone’s there.
4. Watch your feet. The constricted pathways here are prime locations for ground-based attacks, whether in the form of Claymores, Proximity Mines, or Suppression Mines. Scan the floor when racing through or equip the Spotter Bonus Perk to avoid an untimely elimination.
5. Broken connection. Due to the popularity of the Stairs, you can bet there will be a lot of movement through the tiny Connector room just north of it. If the enemy is holding fast to this position, fight your way into the room and greet incoming Operators with a Shotgun blast.
6. Cover to cover. To better avoid long-range threats while traveling the road alongside the Canal, use the available cover objects to keep out of view until you can get into a better position at close range.
7. Greet them at the door. With only a few scattered interior locations, the shops and House can get crowded fast when aerial streaks force Operators indoors. Be prepared to fight for the overhead cover in these situations, whether you’re the one running from the streaks or expecting enemies to race in to escape yours.
8. Wheelson coming through. The Wheelson-HS is a formidable streak here, considering the ease of moving through the district’s exterior roads. The parked vehicles additionally help keep the machine obstructed while approaching enemy positions.
9. Enjoy the artwork. Even in a heated battle, there are inevitably quiet moments, offering the perfect opportunity to appreciate the surrounding street art. See the octopus over the Stairs, the dog in the Plaza, and a variety of others throughout the entire district.
10. Deploy to Vondel. The Kunstenaar District provides just a taste of the greater Vondel map launching in Season 04 of Warzone. Grab your squad and head into the match to view the Museum grounds next door as well as the many other points of interest making up this new field of battle.
Stay frosty.
© 2023 Activision Publishing, Inc. ACTIVISION, CALL OF DUTY, CALL OF DUTY WARZONE, and MODERN WARFAREare trademarks of Activision Publishing, Inc. All other trademarks and trade names are the property of their respective owners.
For more information, please visit www.callofduty.com and www.youtube.com/callofduty, and follow @Activision and @CallofDuty on Twitter, Instagram, and Facebook.